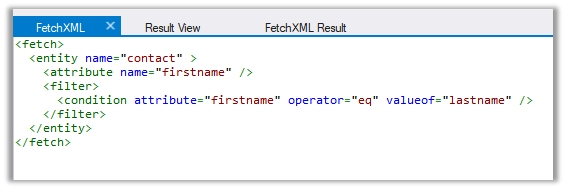
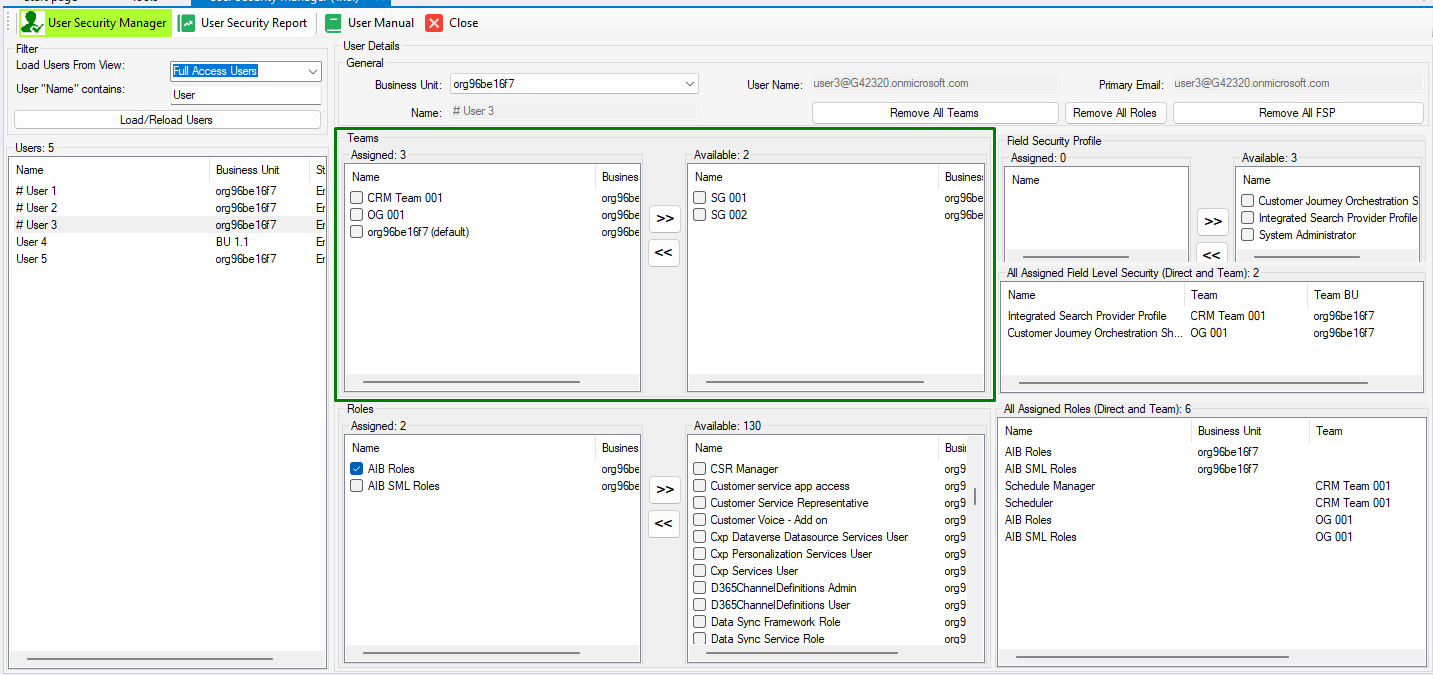
With “User Security Manager,” administrators can easily handle user security in the system. It provides comprehensive information about users and their roles, teams, and field security profiles.
Features:
User Security Manager
- Roles:
- View all security roles assigned to the user directly
- View all security roles assigned to the user via team membership
- Easily assign and remove single or multiple security roles to the user
- Teams:
- View all teams assigned to a user
- Easily add or remove the user to single or multiple teams
- Field Security Profile:
- View all field security profiles assigned to the user directly
- View all field security profiles assigned to the user via team membership
- Easily assign and remove single or multiple field security profiles to the user
- Business Unit:
- Change the Business Unit of the user.
User Security Report
- View and download users and their security role assignment report
- View and download users and their team membership report
- View and download users and their field security profile assignment report
- View and download reports of one or multiple users
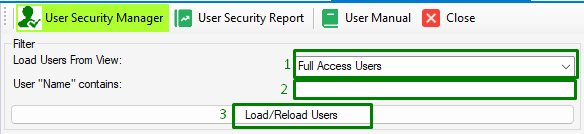
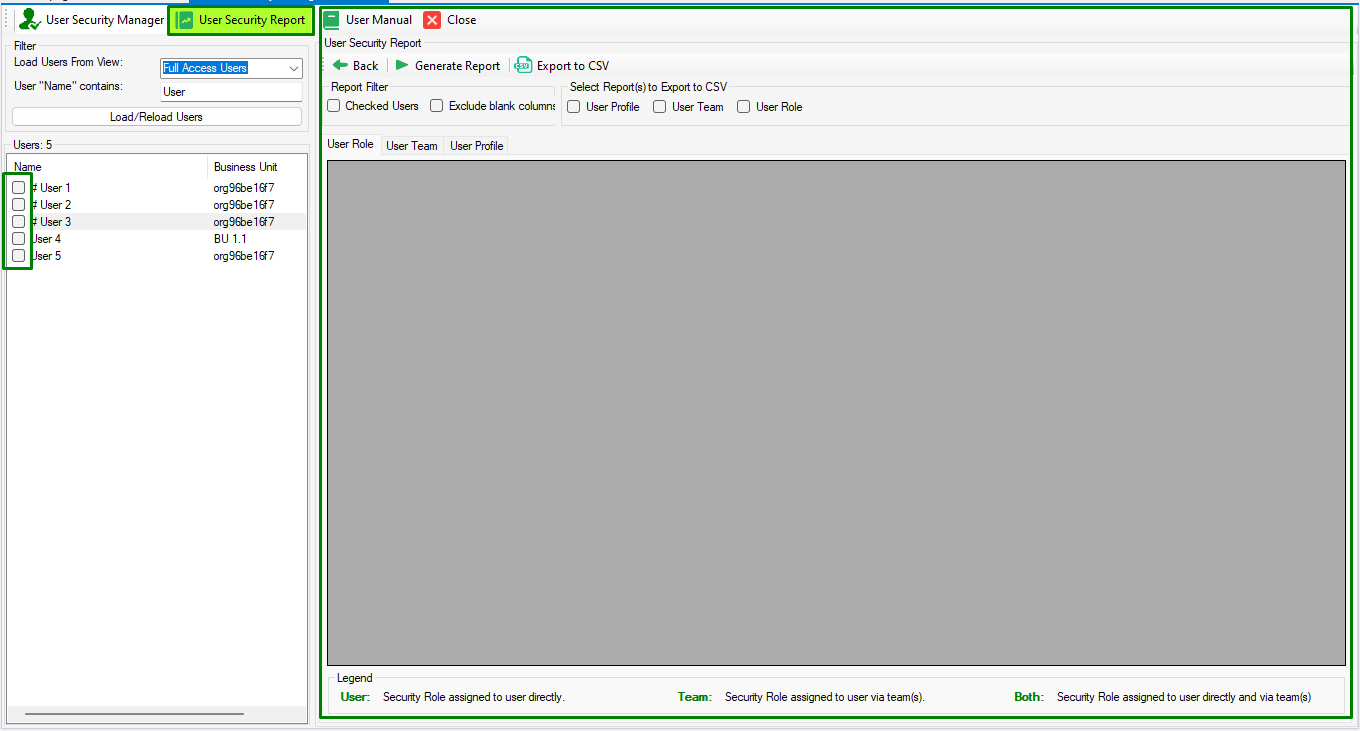
Filter & Load Users
- Select a system view or personal view of the user table.
- Enter full or part of a user’s full name
- Click on the “Load/Reload Users” button.
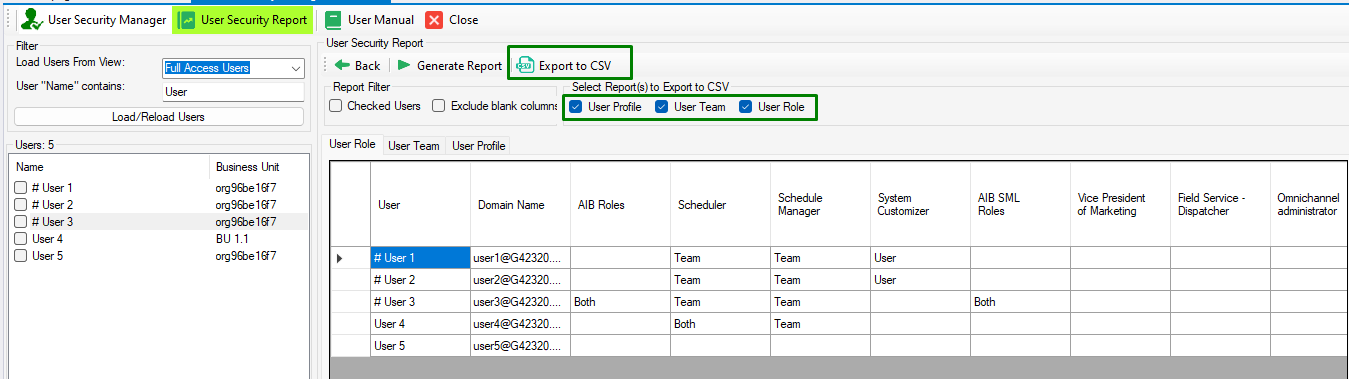
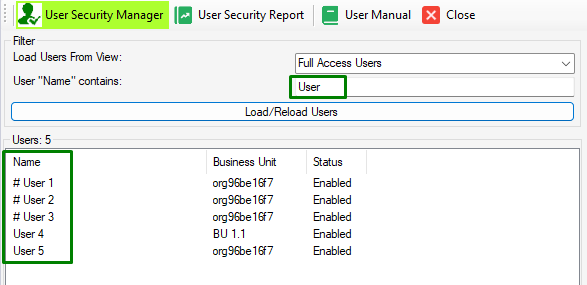
Example: The below screenshot shows all “Full Access” users having “User” in their name.
User Security Manager
Manage User Business Unit (BU)
1- Select the user to manage its security.
2- Selected user details will appear in the “User Details” section on the top right.
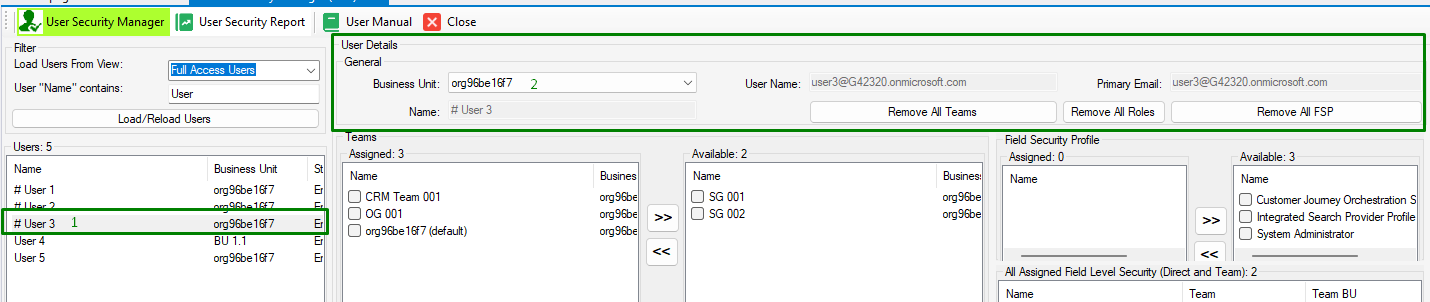
3- To change User BU click on the “Business Unit” drop-down and select new value. You will be asked to confirm the change and on confirmation, BU change will happen.
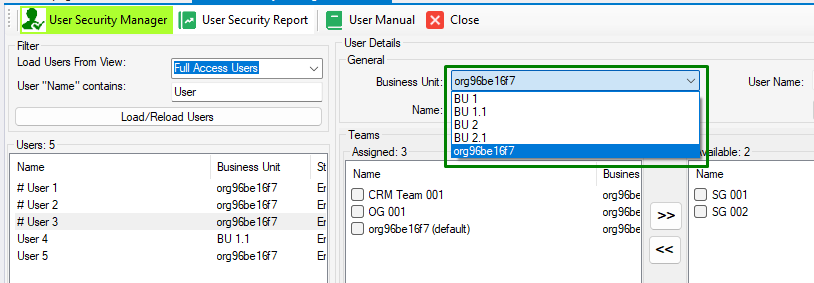
Note: On changing the business unit, all security roles of a user will be removed.
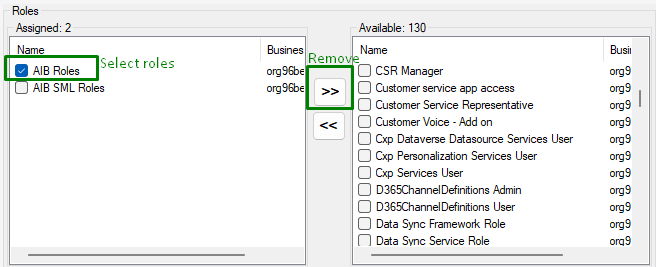
Manage User Roles
1- Select the user to manage its roles.
2- Selected user’s directly assigned roles will appear in the bottom middle section, along with available roles that can be assigned to the user.
3- All user roles “Directly Assigned + Inherited from Teams” will appear in the “Al Assigned Roles” section in the bottom right.
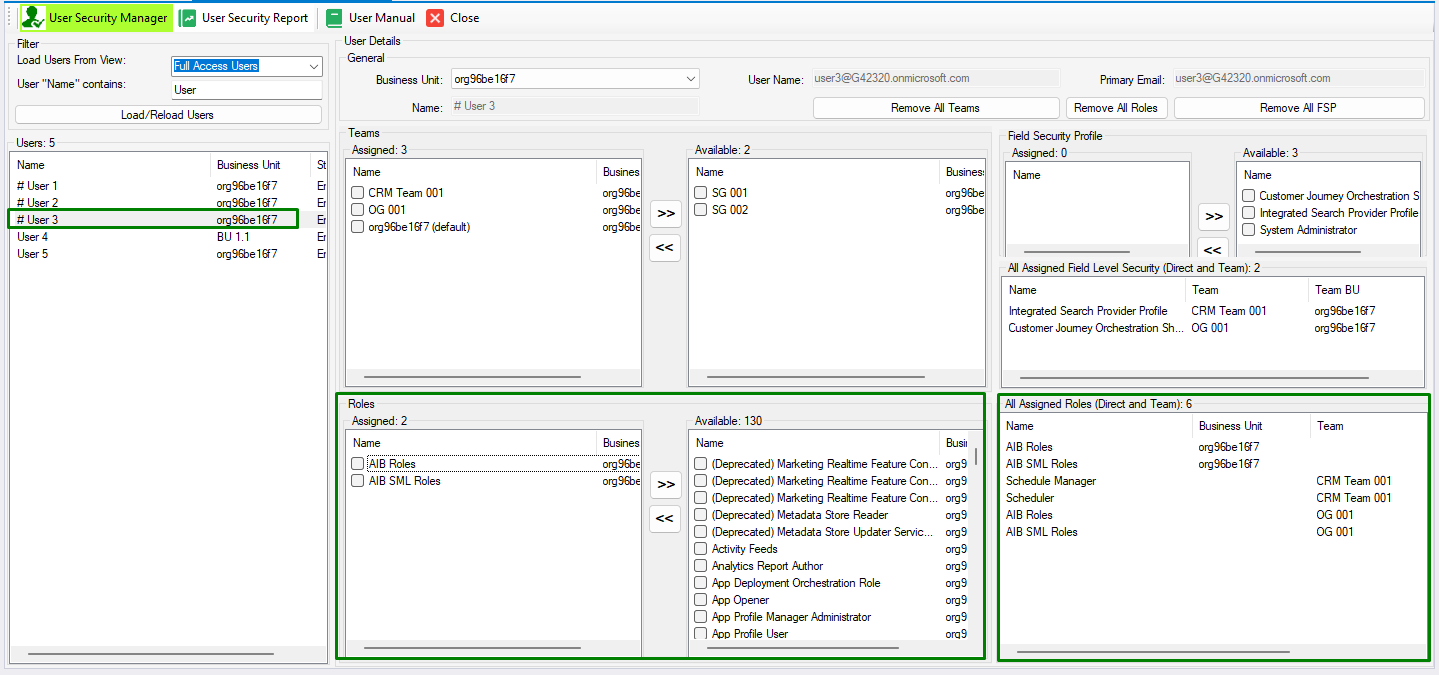
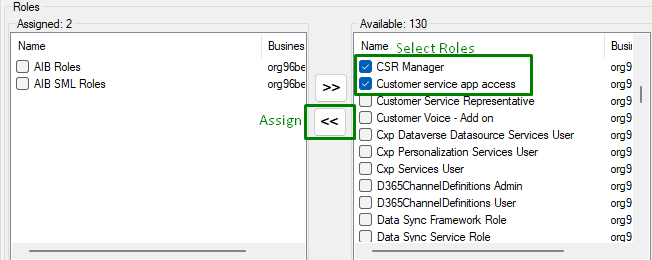
4- To assign new roles to the user select the roles from the available roles and click the assign button.
5- To remove roles from the user select the roles from the assigned roles and click the remove button
6- You can also use the button “Remove All Roles” in the “User Details” section

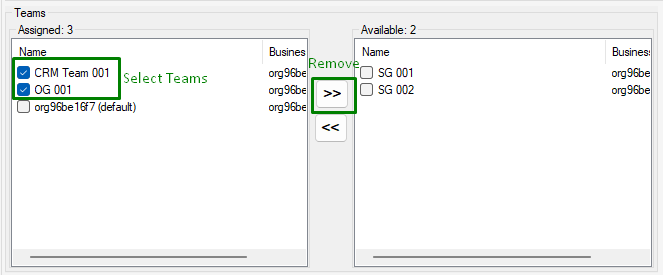
Manage User Teams
1- Select the user to manage its teams.
2- Selected user’s assigned teams will appear in the middle section, along with available teams that can be assigned to the user.
3- To assign new teams to the user select the teams from the available roles and click the assign button.

4- To remove teams from the user select the teams from the assigned teams and click the remove button.
5- You can also use the button “Remove All Teams” in the “User Details” section.

Manage Field Security Profiles (FSP)
1- Select the user to manage its FSPs.
2- Selected user’s assigned FSPs will appear in the middle right section, along with available FSPs that can be assigned to the user.
3- All user FSPs “Directly Assigned + Inherited from Teams” will appear in the “Al Assigned Field Level Security” section in the bottom right.
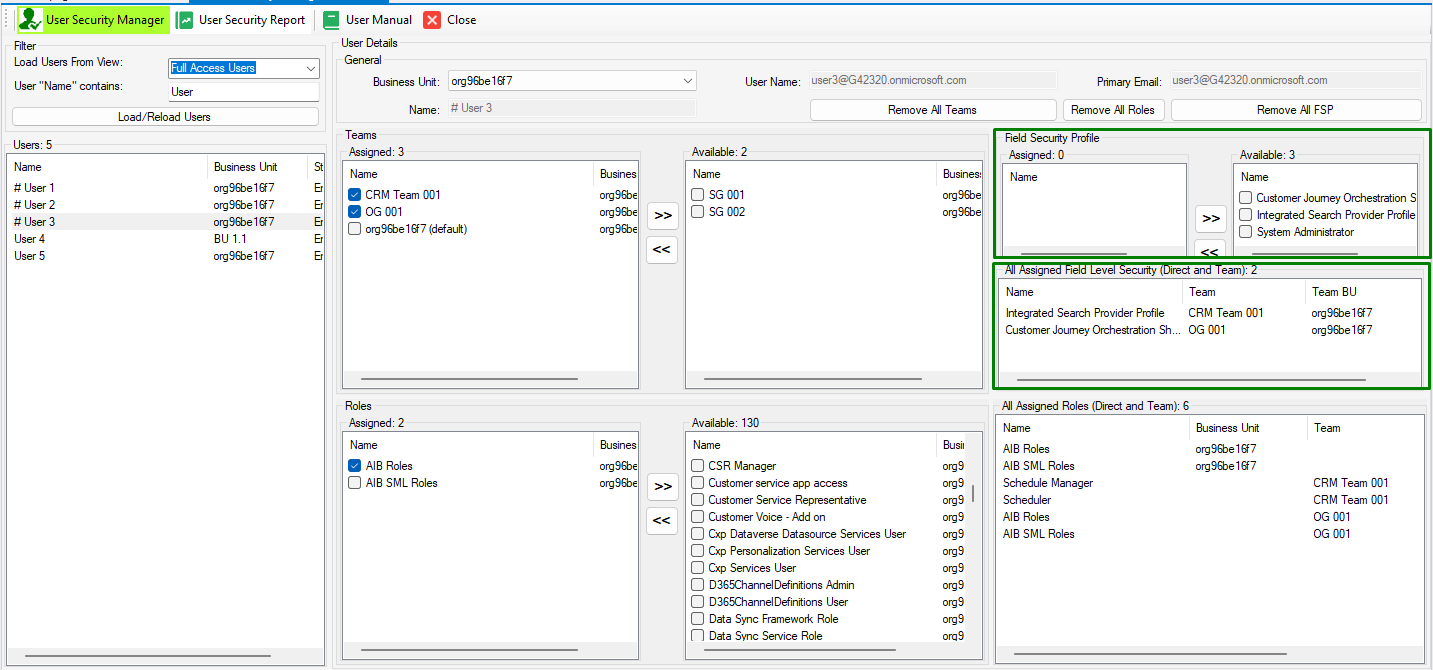
4- To assign new FSPs to the user select the FSPs from the available FSPs and click the assign button.

5- To remove FSPs from the user select the FSPs from the assigned FSPs and click the remove button.
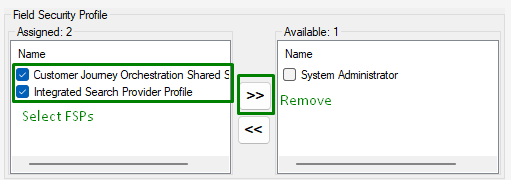
6- You can also use the button “Remove All FSP” in the “User Details” section.

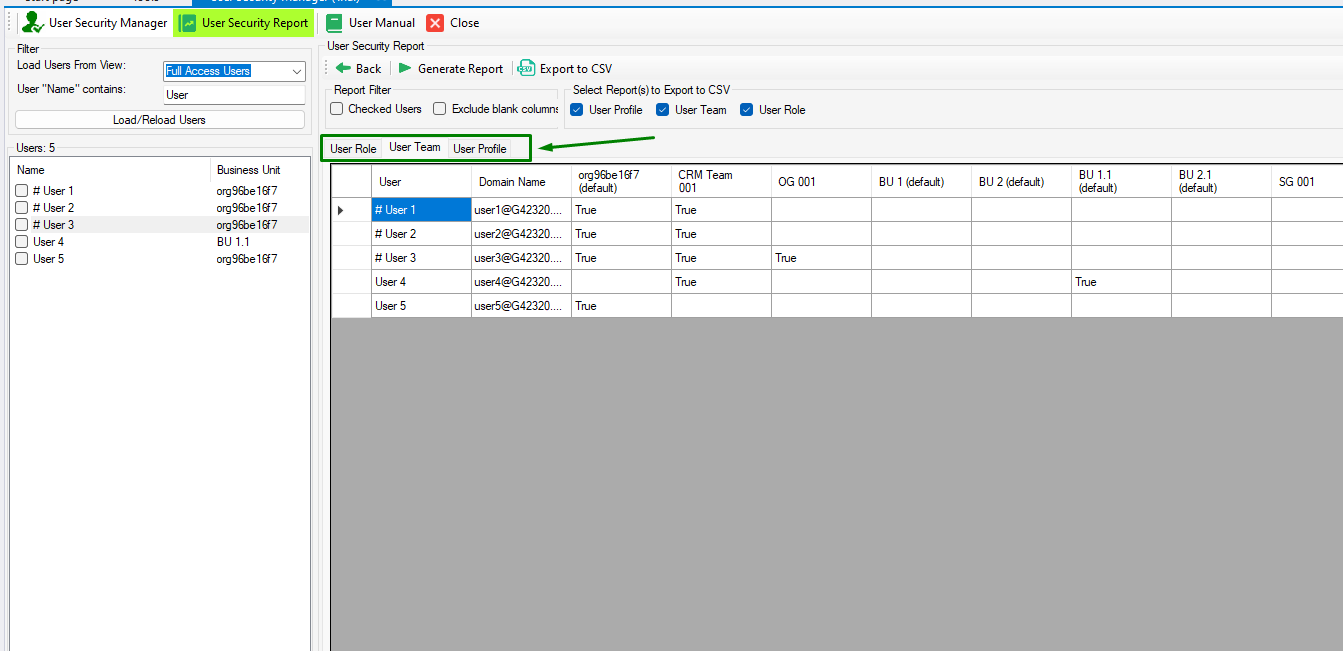
User Security Report
User Security Report allows us to generate reports for
- User Role: User to Role Mapping (All roles a user has either through direct assignment or through teams)
- User Team: User to Teams Mapping
- User Profile: User to Field Security Profile Mapping (All FSPs a user has either through direct assignment or through teams)
To navigate to the User Security Report section, click on the ‘User Security Report‘ button.
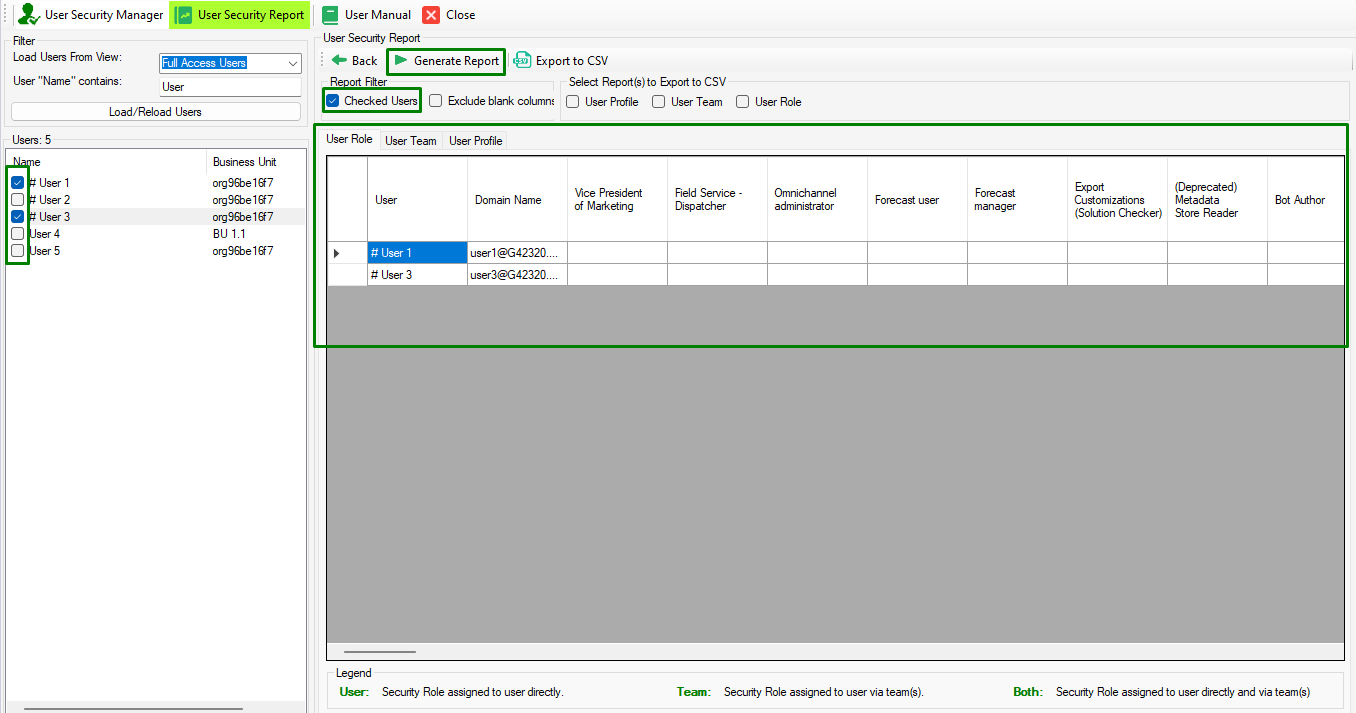
Generate Report
To generate the report for all the users, click on the Generate Report button without applying the Report Filter or Selecting User.

To generate a report for selected users only, choose Checked Users. Select users in the left pane and click on the Generate Report button.
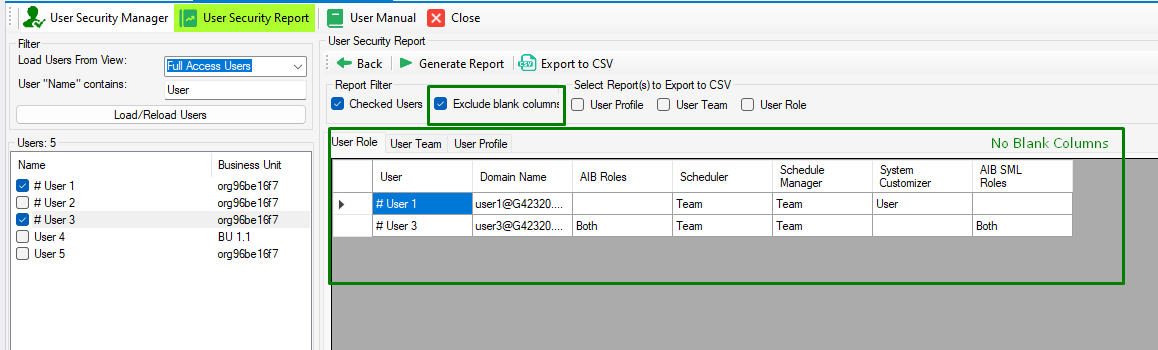
To exclude the column having blank values in it, Check the Exclude blank columns option in the Report Filter section and click the Generate Report button.
To view a report data click on the tab as shown below.
Export Report
To export the report in csv format select one or multiple reports then click the button Export to CSV and select a folder location to save the file. data displayed in the report screen will be downloaded in csv format.